


Intro
Hi there fellow dev, this is article one of the visualizing JavaScript series. In this article we will create a web page with auto changing background images and we will do this in just four steps!
If you're new to this series I'd suggest you check out article zero to get a better understanding of the goal of this series.
I'm ready to go, and I hope you are too, all you need for this project is a code editor and four images you would like to use for this project. Just code along with me, write comments on your code as we go and you'll be doing this for fun in no time!
Step 1
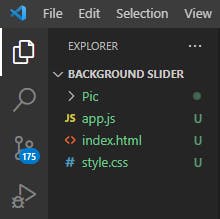
Our first step is to open up our code editor and create a folder containing index.html, style.css, app.js and a folder containing your images (having a separate folder for your images makes your workspace cleaner). Your editor should look similar to the image below.
Step 2
Link your CSS and JS files to your HTML code and open your live server so you can see whatever changes you make to your code shown in real time
Create a section with a class of hero as shown below
<section class="hero"></section>
Now move to the stylesheet and add the following code to style our page appropriately.
.hero {
    background-size: cover;
    background-position: center;
    background-repeat: no-repeat;
    height: 100vh;
    width: 100vw;
    transition: 2s ease;
};
That’s all the styling we need for this to work the way we want it to.
Step 3
Move to your JS file and type the code snippet below in it, I'll explain what we're doing here so don't worry if you don't completely get it,
let hero = document.querySelector('.hero')
let imageContainer = [];

imageContainer[0] = "./Pic/image1.jpg";
imageContainer[1] = "./Pic/image2.jpg";
imageContainer[2] = "./Pic/image3.jpg";
imageContainer[3] = "./Pic/image4.jpg";
*Note: The name of your folder and images could be different from mine so be sure to check the names and change the code to reflect the names on your own computer.
By doing this we basically have an array with four images as each item of the array. This is necessary because our background will be made up of the items in the array.
Step 4
Type the following code into your editor, don’t worry we’ll explain what each one does when we’re done typing
let i = 0;
const bgSlider = () => {
    hero.style.backgroundImage = `url(${imageContainer[i]})`
if (i < imageContainer.length - 1){
    i++
} else { i = 0 }
    setTimeout("bgSlider()", 6000)
};
bgSlider();
Wow, look at that, it works! (I hope it works, if it’s not, check your code and compare it with the one here to see where the error is) Let’s go through the logic behind each line of code to understand how it contributes to our project
let i = 0;
Now first thing we did was set our array index to 0 or the first array item by writing our i = 0.
const bgSlider = () => { hero.style.backgroundImage =``url(${imageContainer[i] })
Next we created a function with the name bgSlider, inside that function we set the background Image of our html body to the first array item. We use a template literal (${}) to access our array item’s url or path. Template literals are useful for some situations when you want to access array items or object items directly.
if (i < imageContainer.length - 1){
    i++
} else { i = 0 };
Once we access this we can now write an if/else statement. The if/else statement is one of several ways to iterate through an array, you can read about other ways to iterate through an array at MDN docs.
In our code what we mean by (i < imageContainer.length - 1) is if the current index is less than the length of the array minus one, move to the next array item.
Remember we have four items in the array, so array length is 4, however our indexes only get up to 3 (remember array indexing starts at 0), so saying array length – 1 is a way of ensuring our loop stops on the last item in the array else we’d get a bug.
You might wonder what happens when the loop gets to the last item of the array, where does it go next? That’s what the ‘else’ statement is there for, it basically says once the loop has gotten to the end of the array, start all over at the first item.
setTimeout("bgSlider()", 6000)
After our if…else statement we have the setTimeout function which basically takes in two arguments, the code to run and the number of milliseconds it should be delayed. In our code we use the setTimeout function to delay our function call by 6000 milliseconds which is 6 seconds(JavaScript uses milliseconds as the measurement for time not seconds, so we have to pass in 6000 milliseconds and not 6 seconds).
At this point you might wonder if it would take 6 seconds for our first background to even show up. This is not the case, remember JavaScript is an interpreted language which means an interpreter in the browser or computer reads your code line by line and executes it as it goes. This means our first few lines of code will be read and executed before we arrive at the setTimeout function, this way we already have our first image up, then 6 seconds later our function will be rerun and the loop will iterate to the next item.
Finally we call the function itself to run (Another term for calling the function is invoking the function), it is important to invoke a function after writing it or it will not run. It is basically ignored.
Conclusion
Whew, we’re done, we successfully applied seemingly abstract JavaScript logic to a real world situation, we learned how to create a webpage with changing background images using a few JavaScript terms and a bit of JavaScript logic, pretty cool huh! and we're just getting started. There are lot more cool stuff to build!
Writing this has been extremely fun and I hope it was the same for you while reading and coding along. Please do not hesitate to comment, ask questions or mention any issue you might have faced. I’ll be sure to reply in a reasonable amount of time.